Developing a Project
This is the second tutorial in a series.
From the introductory tutorial, we saw how
to select a destination (file or URL).
Initially, it’s also beneficial to
view the destination’s source along with the
browser window.
You can either search for what interests you
in the source window, or use inspect element to
get to the item that interests you.
Once you’ve quickly found the item of interest, you can start trying various tree traversal commands to get to related items in [S]crape, view the nodes found, and save some part of their content in [S]crape variables for output. You can also save your script activity into a script, which you can edit and run later in [S]crape.
In this tutorial we’ll see how to backtrack and make corrections. We’ll also see how the various [S]crape commands behave when applied to multiple nodes.
Note
A word about [S]crape ing public sites:
Be a Good Citizen!
- avoid repeatedly hitting a site, and loading its servers;
- always check for copyright, and observe fair use doctrines.
PyCon Volunteer Reporting
Here’s our project: the US PyCon 2013 Conference is coming up. PyCon is a community conference and depends heavily on voluneers. We want to track how many volunteers we still need for session staff [1].
The conference site lists the sessions and staff on http://us.pycon.org/2013/schedule/sessions. Since this will likely change dynamically, we’ll use a snapshot version we saved, just as you would when first developing a script (in order to spare repeatedly hitting a site’s servers). Having a static copy will also make it easier to follow along with the tutorial (also, after the conference, there will be no unfulfilled needs, so the web data won’t be as interesting):
- download
tutorial2.zip.
Getting Oriented with [S]crape Commands
Let’s review what we’ve learned so far.
When you open [S]crape with a URL, [S]crape opens
the url in a browser and parses it into a tree of nodes
held in scrape.
These nodes are what you navigate.
Using xpath and cssselect you select nodes and
extract data.
The ability to inspect aspects during the process is useful, as well as being able to run scripts in batch.
In this tutorial we’ll introduce some of the rhyme and reason behind [S]crape. Since [S]crape has over 60 commands, let’s start by describing some structure around the commands (we will only introduce some of them in this tutorial).
![[S]crape Context](../_images/graphviz-5b80bd82137457c5d465f221bd1045db439506e5.png)
[S]crape commands affect each of these areas. Most of the action happens in the hub - in [S]crape itself. The type of commands in [S]crape are:
- navigation
- content extraction (capturing)
- interaction
- settings
- variables
A Starting Strategy
The first time you open a target URL it can be useful
to open the page’s source from the browser (I have them
side-by-side at first).
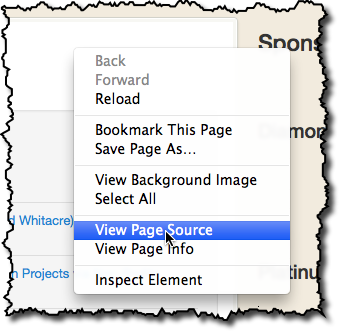
right-click in the browser page:
For smaller pages, it can be useful to search in the source
for what interested you in the browser.
For larger pages, it can sometimes be easier to simply
highlight what interests you in the web page, and use
the [S]crape grab command to give you a small context.
From there, it can be easier to search for the larger
context in the source window, so you can get a good
view of the context around your interest.
Let’s do that now.
Unzip the tutorial file (I’ve replaced the >1M in images with
a single pixel gif to keep things manageable).
You should have a file sessions.html and a directory
sessions_files.
Assuming you’ve unzipped in the current directory
run scrape:
$ scrape sessions.html
To orient ourselves, use a few of the interaction commands from the Introductory Tutorial:
[S]crape >>> nodes
2
[S]crape >>> tags
['head', 'body']
[S]crape >>>
In this case, we are not concerned with any of the meta-data
which might be in the <head/>:
[S]crape >>> body
[S]crape >>> nodes
7
[S]crape >>> tags
['header', 'div', 'script', 'script', 'script', 'script', 'div']
[S]crape >>>
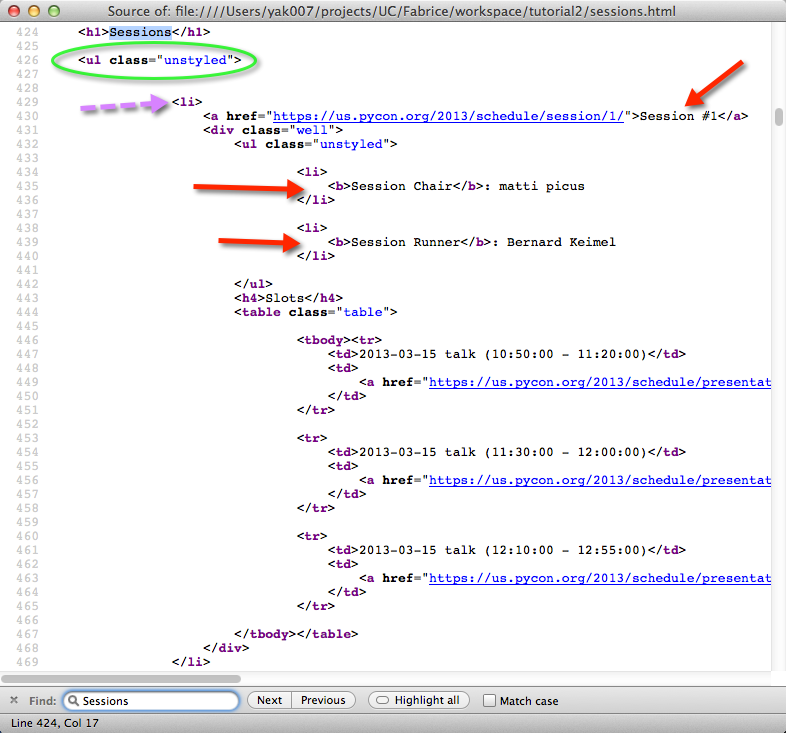
Looking at our browser window, the sessions are named and listed as visual blocks. Here are the parts interesting for our task:

Scrolling to the bottom of the browser page, we see there are 42 sessions.
We can see that each session has a Session Chair and a Session Runner.
If no one has signed up, the page shows: No volunteers signed up.
We need a total of 84 volunteers. We’ll need to gather information
after the session name (e.g. Session #1).
Unfortunately, there’s a lot of HTML code for headers, sponsors,
and so forth - but let’s go to our browser’s source window and search for Sessions.
It looks like our info is all contained in an HTML list.
Let’s just start by seeing what happens when we try to get the list of sessions. If we try findclass:
[S]crape >>> findclass unstyled
[S]crape >>> nodes
43
[S]crape >>>
It looks like we might have gotten the 42 session (their content looks to be held
in <ul class="unstyled"> lists), and the outermost list holding them.
You can look at what was selected with show node, but it’s a little easier to
digest at this point in the browser-source window.
This is close to what we wanted, but not quite.
Adjusting Course
If you use further [S]crape navigation commands (such as findclass), they will act from each of the currently selected nodes. We’re not where we want to be, so let’s back up:
[S]crape >>> body
Some smaller ways you can back up in the tree:
- doc, or root (aliases)
- getprevious
- getparent
See the help for these, and experiment with them.
Now, let’s try a couple of other commands to see if you can get to the 42 nodes of interest (look for hints in the browser-source view). Here are a few examples (I’ll omit the output, so be sure to follow along at your computer):
[S]crape >>> flindclass unstyled
[S]crape >>> nodes
[S]crape >>> tags
[S]crape >>> body
[S]crape >>> help cssselect
[S]crape >>> cssselect div.box-content ul.unstyled
[S]crape >>> nodes
[S]crape >>> tags
There are a couple of ways to get to what we want (you may find others).
Cssselectors are easy to write and powerful.
Xpath expressions are explicit and functional (if you learn xpath expressions,
you can take advantage of that knowledge for navigating XML documents also).
I find that either cssselect h1+ul.unstyled or find .//ul[@class='unstyled']
work.
The css expression says:
get all the elementsulwhich immediately follow anh1, and which have classunstyled.
The xpath expression says:
get the next (single)ulnode with classunstyled.
The .//tag_name form says
look anywhere (any depth) under the current node.
I prefer the xpath expression - for this case, it seems more suitable, closer to what we intend.
[S]crape >>> body
[S]crape >>> find .//ul[@class="unstyled"]
[S]crape >>> nodes
[S]crape >>> show node
This looks like the spot we were interested in, in the browser-source.
Saving Output
So that we can have context, let’s collect the session name.
Let’s also scrape the text of the first ul under that - the session volunteers.
I want to have 42 names, and 42 pieces of volunteer information.
Thus we can determine which sessions have needs.
The first ul under each session name will do this for us.
First, lets try to select the sessions. From the last show command, we can
see Session #42.
[S]crape >>> findall ./li
[S]crape >>> nodes
[S]crape >>> show
Note that findall has a single '/' -
this will find only direct children of our current ul node.
Now lets get our session names:
[S]crape >>> find ./a
[S]crape >>> nodes
[S]crape >>> show
We use find (not findall) because we only want the first a tag under each of our 42 nodes.
This time, the show command is a joy to look at - it’s clear that we have the session names, that our 42 nodes are indeed exactly what we want. The text of these nodes contain the session names we want. We’re ready to setup some variables:
[S]crape >>> [sessions_table]
[S]crape >>> <session>
[S]crape >>> text
[S]crape >>> show out
We have our 42 session names waiting to be output. But still we need to add information about the volunteer status of each.
Thankfully, we have the browser-source window to refer to.
We can see that after the <a> containing our session names we want
the ul nodes which are the first children of the div tag following li.
The getnext command will get the next sibling node (the div we want).
From there we will get the ul directly under:
[S]crape >>> getnext
[S]crape >>> nodes    # confirm
[S]crape >>> show
[S]crape >>> find ./ul
[S]crape >>> nodes    # still looks good
Where text will get the text inside the tag (up to the next child tag), text_content will get all the text inside a tag, even that inside other enclosed nodes. We’re ready to save the status of the volunteers - we’ll put this in a volunteer variable.
[S]crape >>> <volunteer>
[S]crape >>> text_content
[S]crape >>> show out
There is a good deal of white space, but we’ll easily deal with that outside of scrape. I think the form of show out (yaml) would be easy to read into a python script which will do the counting.
[S]crape >>> yaml sessions.yaml
You could have also saved this as either json or csv (the latter using the table command). Either json or yaml is convenient for loading into python data structures. I chose yaml because it is easy on the eyes when viewing the scraped data file.
Running Another Day
We’ll need to run this script quite often to keep the current volunteer needs up to date, so we’ll need to save our script.
Have a look at your history:
[S]crape >>> history
Notice that history shows your navigation commands, but not your interactive insepction commands. Scripts are saved from this command history, so inspection commands are not stored there.
You could edit your script file (comments start with '#'),
and eliminate any false starts, and test the edited result, or
you could select which part of your history to save, and go from there.
You decide:
[S]crape >>> help save
[S]crape >>> save sessions.scrape
Before you exit [S]crape, edit your file, and test it by running it against the current page (I use the gvim editor; you should use your favorite):
[S]crape >>> clear volunteers session   # clear variables
[S]crape >>> show out    # should now have no output pending
[S]crape >>> load sessions.scrape
[S]crape >>> show out
Loading a script runs it against the current document tree.
You can run your script in headless mode:
$ scrape -H -s sessions.scrape http://us.pycon.org/2013/schedule/sessions
I leave it to you to develop a script to count and report on volunteer needs, based on sessions.yaml. Mine was under 12 lines of python. Whatever you use for postprocessing, you can also run it from your sessions.scrape by adding something like this to the bottom of your script:
# after saving your yaml / json / csv file:
!python my_script.py sessions.yaml
Summary
After this exercise, your script should look similar:
##  Count volunteer signups for PyCon Sessions
#
# open http://us.pycon.org/2013/schedule/sessions/
#
body
# I save to a different name than this table, which would be default;
[s_table]
find .//ul[@class='unstyled']
findall ./li
find ./a
<session>  # column1: the session name
text
getnext
find ./ul
<txt>     # column2: who's signed up to staff the session;
text_content
yaml sessions
!python session_volunteer_counter.py sessions.yaml
Let’s look at which commands in [S]crape we used:
- navigation:
- body
- cssselect
- find
- findall
- findclass
- getnext
- capturing:
- text
- text_content
- interaction:
- help
- history
- nodes
- show
- show out
- tags
- settings:
- headless (-H)
- variables:
- clear
- “[...]”, or table
- “<...>”, or var
- output:
- yaml
- scripts:
- load
- save
- shell:
- ”!”, or shell
Happy ![]() ing!
ing!
Footnotes
| [1] | Session staff consist of chairs and runners. Chairs introduce speakers, manage questions and keep track of time. Runners get speakers to their talk on time and ensure they have everything they need. A typical session consists of 3 talks. Sessions run simultaneously in multiple rooms. |